My intention for this tutorial is to make Vray rendering less complicated and make you aware of what is happening in your scenes. In this tutorial, we will go over with mostly used set up of using Irradiance Map and Light Cache.
NOTES ON THE WHOLE PROCESS
-This process is resolution dependent, but same visual principles apply to bigger images.
-This is Linear workflow.
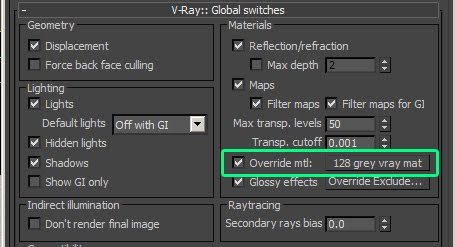
-Possibly we will have different scene to test the tutorial. Complex lighting and materials will mean increase render times. I suggest you make it simple and override your scene with 128 grey Vray material.
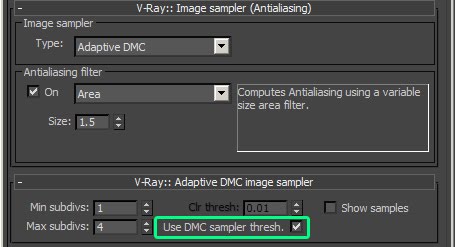
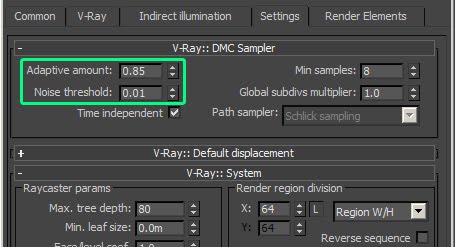
SET A STANDARD DMC VALUE
First thing to do is to set a stndard DMC value.
The highlighted value links to these 2 under the settings tab where the adaptive amount controls how adaptive the samples will apply over surfaces, i.e. 1 is fully adaptive and will place the samples as wide as it can across large surfaces, and 0 will put samples very close to one another and take longer to render.
Leave these as they are below:
We will come back later and set this using the color threshold.
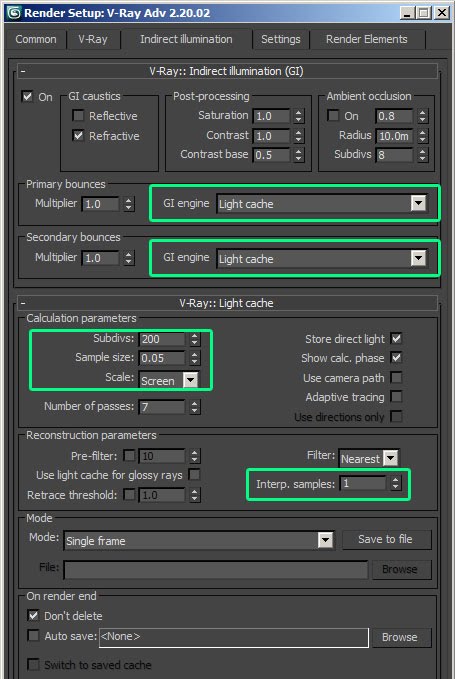
LIGHT CACHE TEST
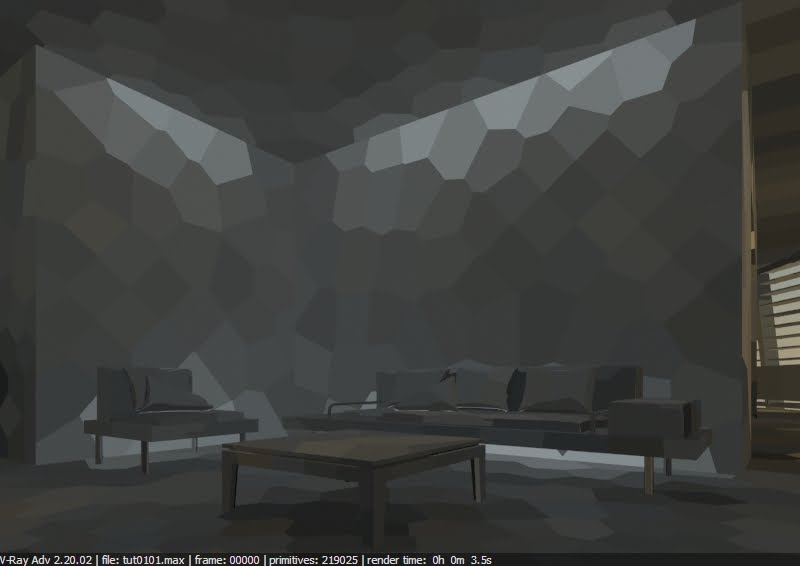
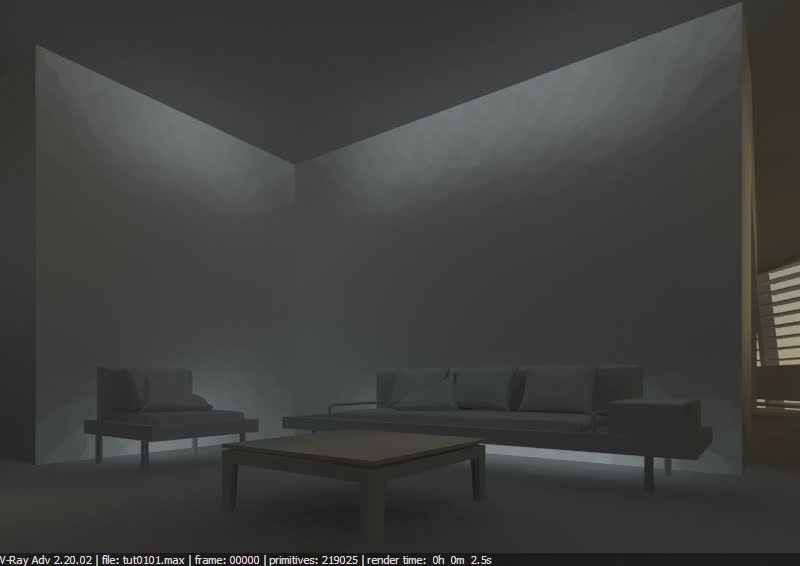
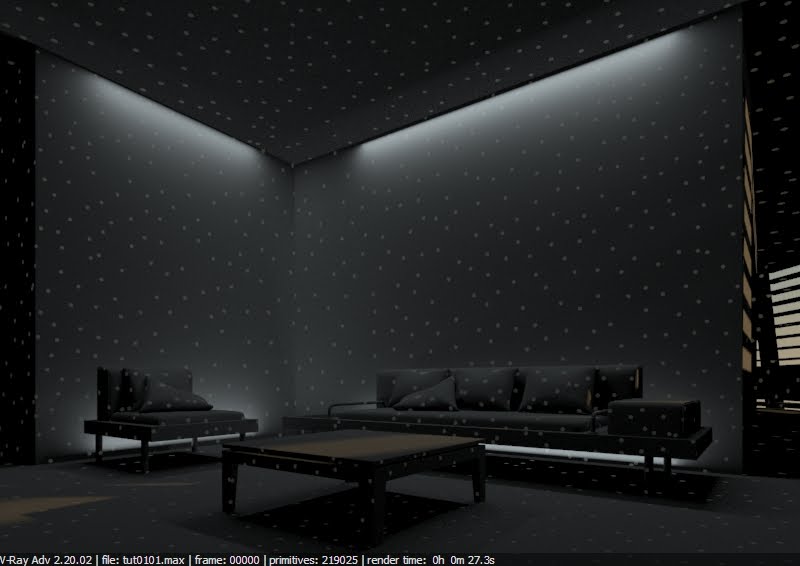
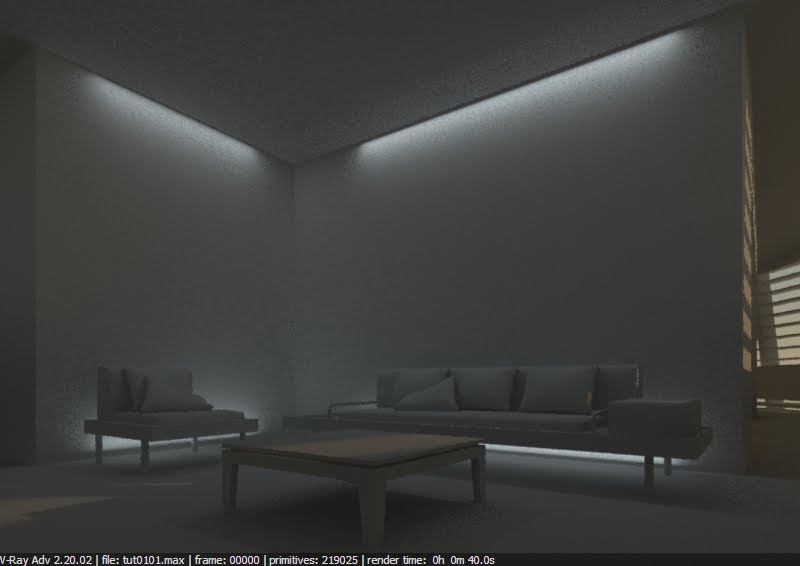
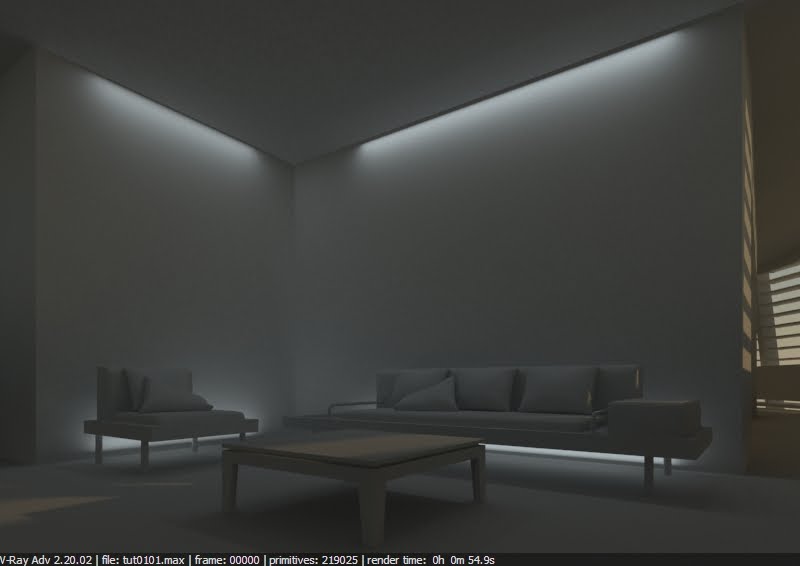
Next set your primary and secondary bounces to light cache and set Subdivision 200, Sample size 0.05, Scale to Screen and Interpolation samples to 1.
Set the subdivision fairly low, the sample size to fairly big and most importantly the interpolation samples is set to 1, so there is no blurring between the samples and we can explicitly see what is going on. Hit render and you should get something like this:
Notice that samples are quite big, this means its going to miss out detail, light samples will stretch to cover all the surfaces in our scene. This cause light leaks or bleeding through walls.
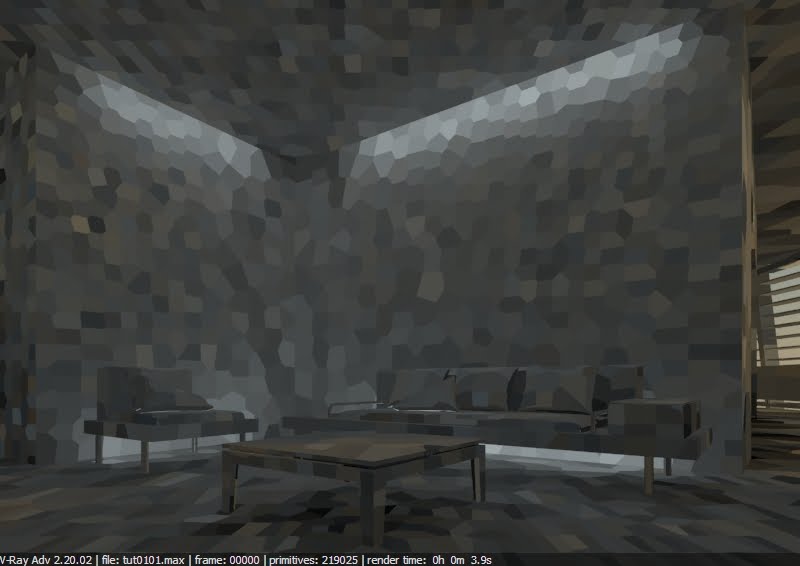
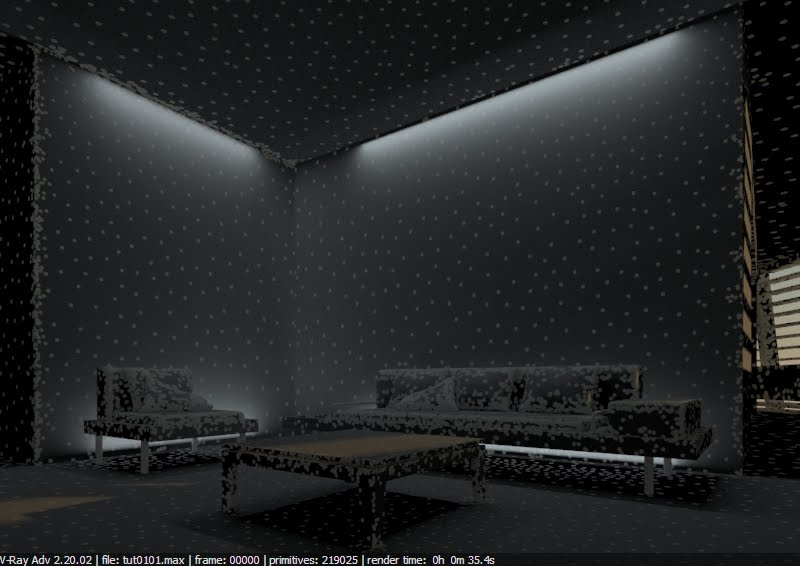
If you say, why not make sample very small to catch the details? Because it is going to introduce noise. Try setting the sample size to 0.001 and see what it looks like.
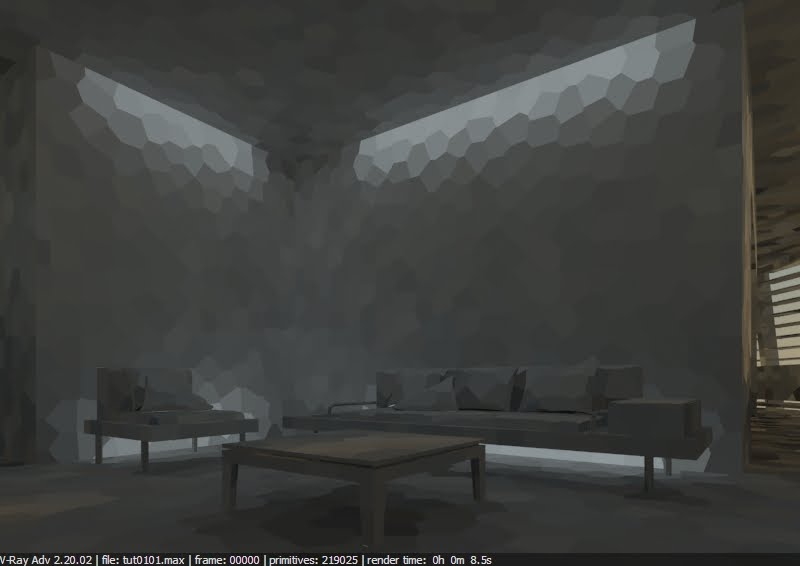
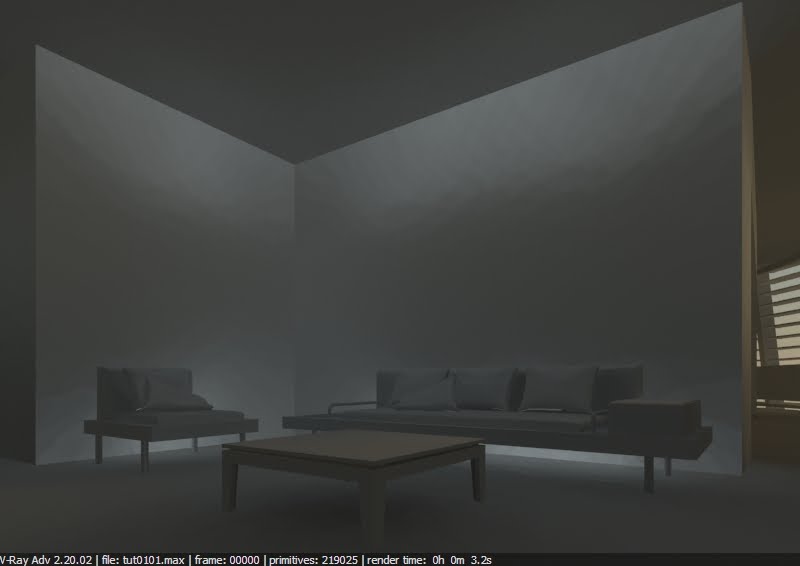
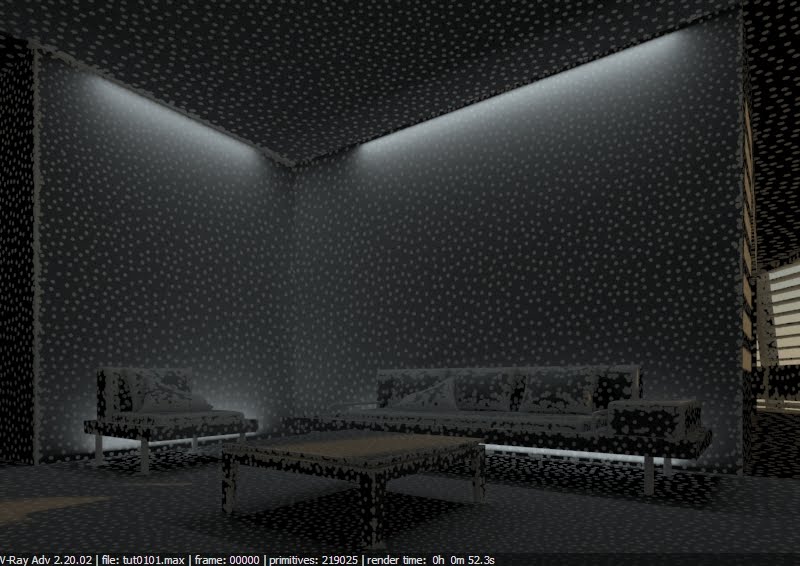
You can see how this result, even with more subdivs and blurred with the interpolation samples will create a noisy solution? Try 0.02 and you should get something like this:
This is a fairly good size. It will cover most shadow detail in a general way, but any smaller and we create more noise. Figure out the compromise.
Now let’s adjust the subdivisions. Each time VRay sends out a “ray” from the camera it hits a surface and makes a sphere of the sample size and subdivides that sphere into a number of
ray calculations; the more subdivisions the better quality the solution as it is calculating more samples. See it is also checking out its neighbor's coloring and then using that to color itself.
Test the subdivision in 500 increments up to 2000 and see what you get. See the difference in smoothing of the sample colors and the corresponding render times going up?
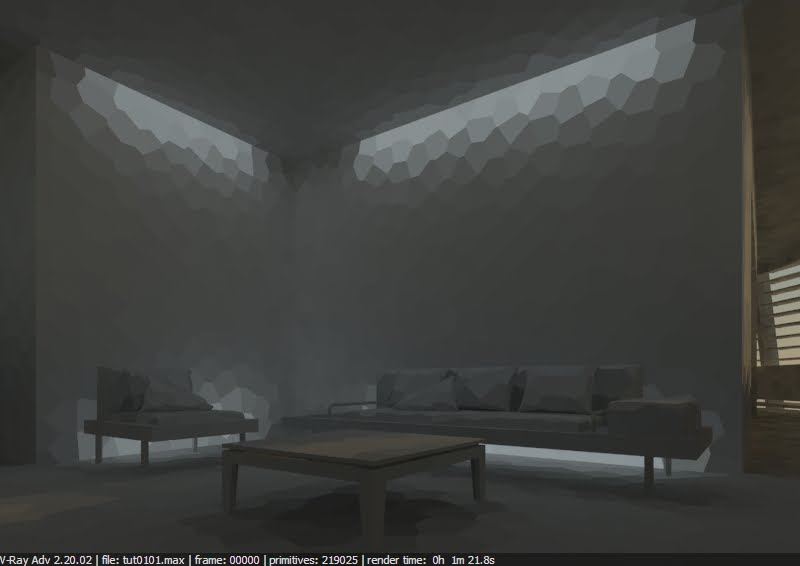
Try a Subdivision of 1500:
Try Subdivision 1800:
Try Subdivision 2000:
Subdivision 2000 is okay so far. But I decided to pick subdivision 1800.
Keep subdivision to 1800 and change the light cache from “screen” to “world” and change the sample size to 0.2m (keeping 1800 subdivs):
See how I am now getting more samples beneath table and seats, as it is now dividing up the samples into 0.2 meter samples. For this scene this might be a better solution as I don’t have much
in the background, it’s an interior scene.
Now we have this solution, save it out so we don’t have to calculate it when testing other things and save a huge amount of render time. Do this by hitting “save” and save as say LC:
Then change this to From file and browse the saved LC we made:
Just remember to change it back to single frame if you change any of the light cache settings or move the camera. The only exception to this is the interpolation samples.
Interpolation samples essentially blurs this solution. So you can change this after you’ve saved out as above. Change it to about 40, or whatever you see looks good. Remember this does come at slight cost, the more you blur it the more you lose shadow detail. Again it’s up to you to decide depending on your scene.
Try Sample size 20:
Try Sample size 40:
NOTES on LIGHT CACHE
-The other thing to consider is the difference between light cache “screen” and “world”. world is good for interior type scenes with little background detail, but is bad for massive exterior scenes as the light cache will try and sample hundreds of objects into say 0.1m (whatever you set the sample size to) in the background. This will give a noisy result and take a long time.
-Number of passes refers to the number of cores you have, and VRay will use this to send individual calculations to. Set it to the maximum number. So if you have 8 cores, then 8, or if you have hyper threading enabled set this to 16 (like I have done). If you’re using a render farm, set it to their maximum. A simple way to tell is open task manager and click on the performance tab and see how many CPU meters you have (go to view-CPU history-one graph per CPU to see).
IRRADIANCE MAP TEST
Now change the primary bounce to Irradiance map and keep the secondary as Light Cache. Use the pre-calculated map as above with 40 interp samples.
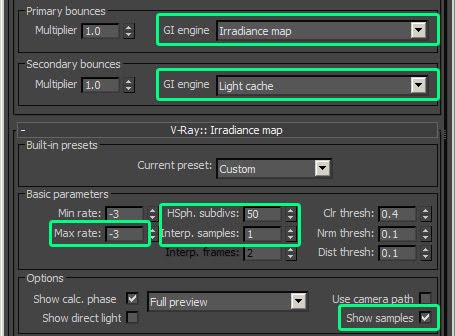
Also change the Irradiance map from a preset to custom, and change the values like the image below. Set the interpolation samples to 1 so we can see what’s happening with the samples:
NOTES ON IRRADIANCE MAP
- This will probably be quite a high quality result. It may slow to render for draft, so these would be our production settings. Now we can go back to the adaptive DMC and use the color threshold to control our quality and render time overall in the next step.
- You can use this method in animation by incrementally saving the irradiance map and light cache to files every, say 10 frames, rather than sending out single passes (use “fly-through” for light cache and “multi-frame incremental” for irradiance map). This will eliminate flicker and save you massive amounts of render time. As long as nothing moves within the scene this is the best way.
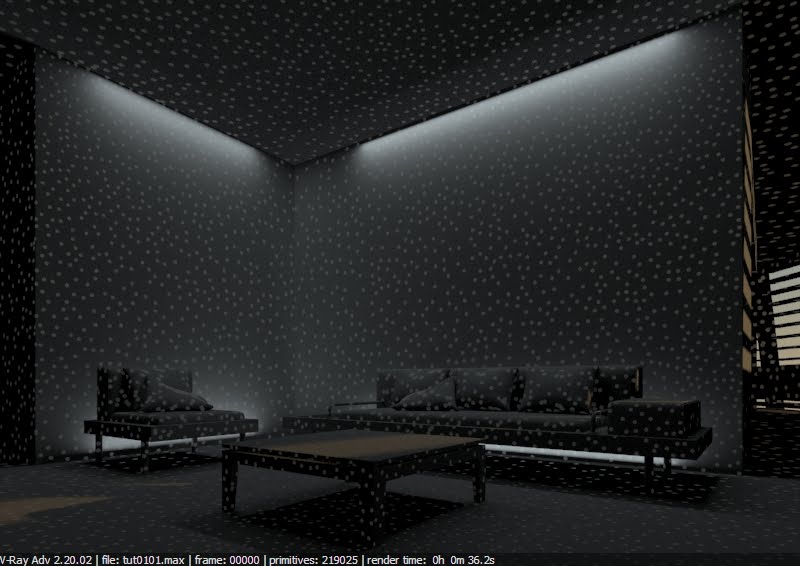
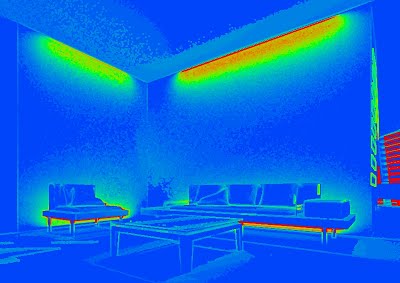
Change the “max rate” to the same as the “min rate”. Let us have a look at where the min rate is putting samples. Do a render and you should see something like this, a blackened image with obvious white samples across the image:
Set the max and min rates to -4 and see what happens. Notice the samples move further apart. You are basically telling the Irradiance map to, on areas that it can be fully adaptive, use minimum for spacing.
Set the max rate to -1, keeping the min rate at -4 and you should get something like this:
See how it is putting samples around the areas of detail? (detail is defined by pixel contrast or threshold difference in colors) So what we want to see is it putting samples on areas of shadow or GI detail that we want. i.e. at the bottom of seats, table and on window surrounds.
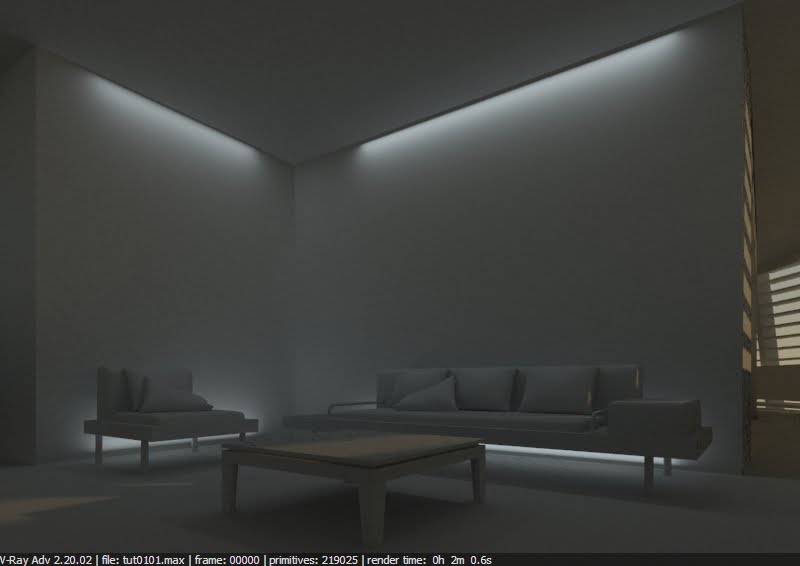
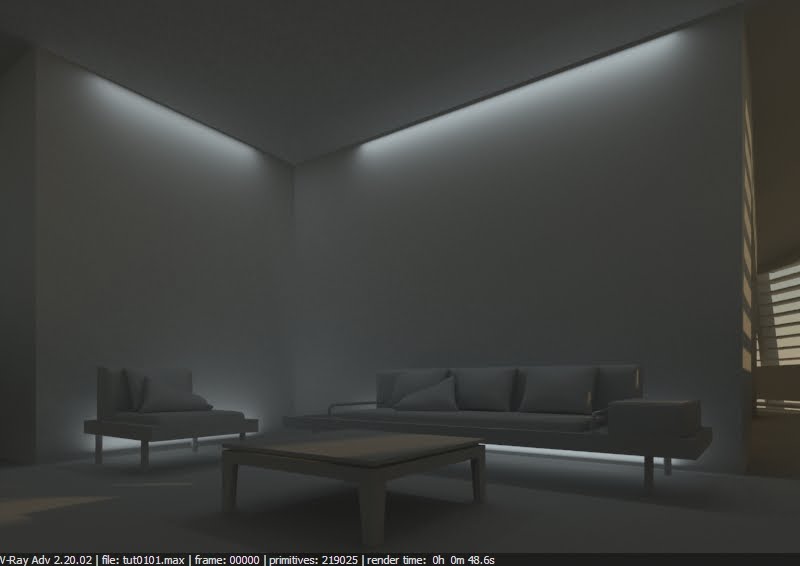
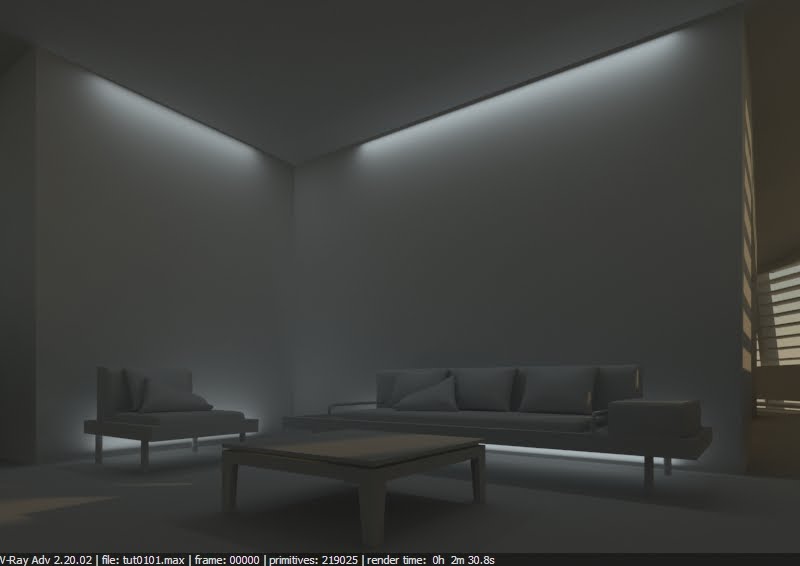
Now try min -3 and max 0.
This looks pretty good, as I now have a good number of samples around areas I want to see shadow detail, like the bottom of the chairs, table and the samples on the windows.
We have get a nice even spread on the wall. Render time is still acceptable at 52.3 seconds.
Let's work with color threshold, this tells VRay how finely to look for contrasts in color between pixels. At 0.1, it will look at extremely small to contrast between colors in pixels and sample
up to it’s maximum rate there. You can see this is too fine, as it’s cover the whole image. These will cost us a lot of time in rendering and cause noise.
Set the color threshold to 0.9. At the opposite end of the scale, it is looking for high contrast of colors in pixels to put it’s samples, and is not very sensitive. You can see how it picks out major details, but detail is lost in the areas between details, or there is not very good blending between fine and course details in shadows.
Let’s keep with a value of 0.3, seems to be putting the samples where we want them. Let us leave “norm thresh” and “dist thresh” alone. Turn “show samples” off, and change the “HSph subdivision” to 20. This stands for hemispherical subdivisions, and relates to the rays sent out by the camera hitting and then subdividing into a number of rays off a surface. The higher the number the more rays are sent out and the higher quality the sample. So this is to do with the quality of the Irradiance sample. Render the scene:
Try and set Hsph subdivision to 50:
Try and set Hsph subdivision to 70:
Try and set Hsph subdivision to 100:
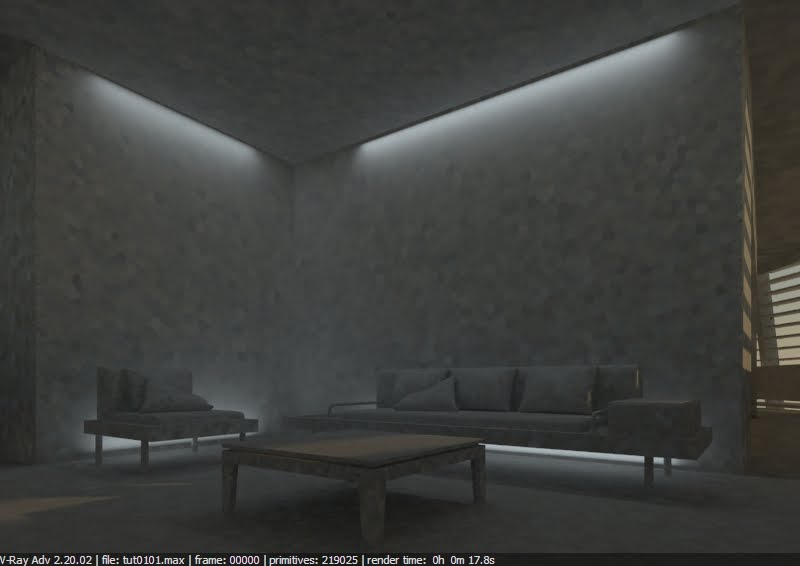
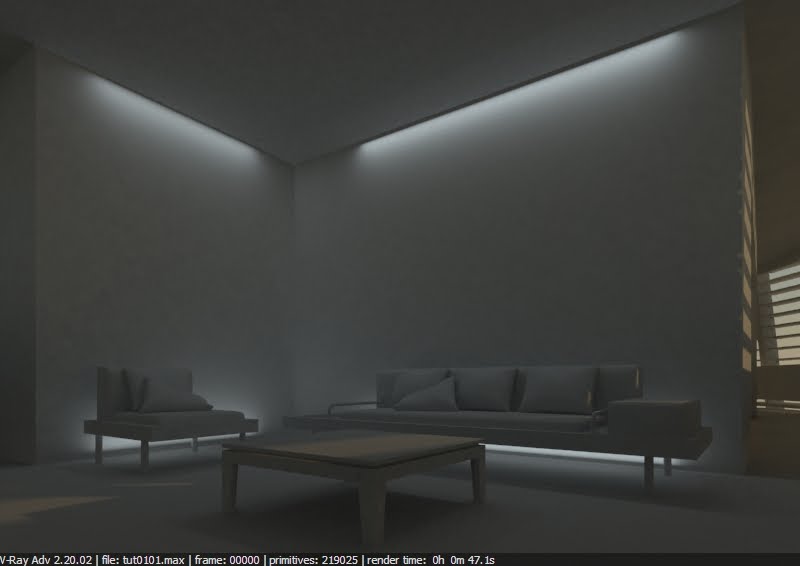
As you can see, it is render time vs noise. The 1st image was 17.8 secs, 2nd 22.8, 3rd 30.4 secs, 4th 47.1 secs. The 1st will probably cause a noisy result, even if we blur it with interpolation amount.
At 50, the samples looks okay, even the spread of color and there are also a few blotches. 100 is not massively better than 50, and comes with a huge cost in render time, so somewhere around 50 is okay.
I used 70 for this test. I give you the decision if you go quality or render time. But now you know what to look for and how to change it.
Now save Irradiance data like we did with the light cache, name it IR::
Change the interpolation samples to 20. More samples will cost you in render time, and like light cache will blur the solution more, but be careful as lots of sample might lose you some shadow detail.
So this is our final image. It has good shadow/GI detail around the seats and table legs on the floor and good depth throughout. Perhaps adjusting or increasing the subdivision on lights might help.
Customize detail level in DMC
The last part of this tutorial is how to set detail levels in terms of anti aliasing, and using the DMC color threshold as a global slider for quality.
If you check back into your Adaptive DMC settings you locked it using the DMC sampler. Now you could keep this as is and adjust the noise and adaptive amount in the settings tab, but you can essentially do a similar job with the color threshold.
So start by unticking the box and changing the “Clr thresh” to 0.1.
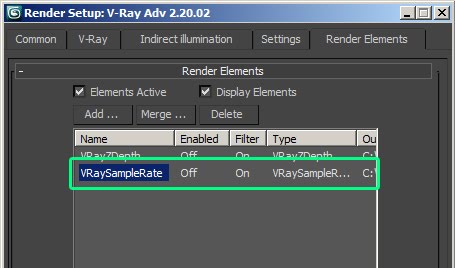
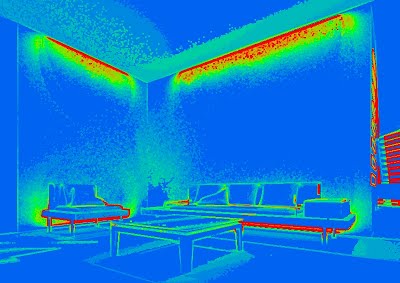
Also go to render elements and add the VRaySampleRate so you can see what is happening with the samples while also looking at beauty pass:
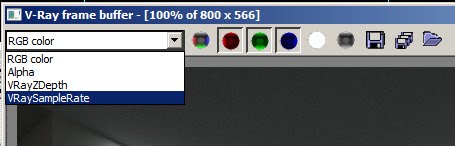
Now in the VRay frame buffer you can view either the RGB image or the Sample rate by changing this.
Hit render using the settings above and you should get something that looks like this:
RGB color:
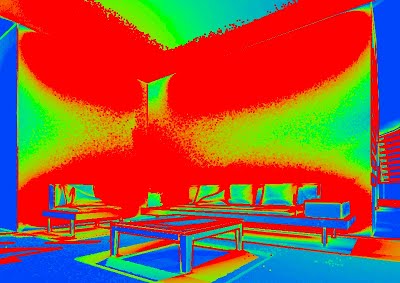
VraySampleRate:
What you see in the VRaySampleRate is where it is putting samples to do the anti aliasing. The lighter the blue, the more samples it is putting in that place.
This is good that we can see what is happening in our image. Next, we need to crank up the quality.
Now try a value of 0.01 in the color threshold:
VraySampleRate:
We can notice lots of sample now, and the image is fairly clean. If you remember, this is the default value for color threshold .01.
We need to pull out more details for the bottom of the seats and table.
Put the max subdivision up to 6 and see what happens. Hit render:
RGB:
VraySampleRate:
If we turn max subdivision up and then samples doesn't show much of a difference. This is because color threshold is capping it off at a certain value.
Change the color threshold to 0.001 and you’ll get a result like below. We can see that now it is picking up detail, and if we had a high resolution, more complex materials and lighting this would take longer times to render.
This value can pick up super fine detail. So, we could set the max subdivision high and just use the color threshold like a global slider of quality that slides between the min and max values.
VraySampleRate:
These are very sensitive values. Look carefully at the visible quality and the render time. If the max rate is too high, it will spend too long on some extremely fine details that is not noticeable.
Run this as low as you can, and then you can run your color threshold at a lower value setting for a high quality image.